
Instagram Bio Link Tracking: Clicks to Conversions
Standard social media reporting rarely captures the full journey from an Instagram profile tap to a completed purchase. Because the single link field in your profile forces you to swap destinations regularly, reusing the same tracking parameters quickly scrambles your historical data. Reliable Instagram bio link tracking requires distinct tagged short URLs to separate redirect clicks from website sessions and on-site actions. This process maps your profile campaigns to specific destination links, measures redirects using Trnqify, and verifies the resulting data in your analytics platform.
You need access to your Instagram profile, your website analytics tool like Google Analytics 4, and a Trnqify account to complete these steps. Gather the specific destination URLs you plan to promote this month before generating any tracking tags.
Measuring the Stages of an Instagram Profile Click
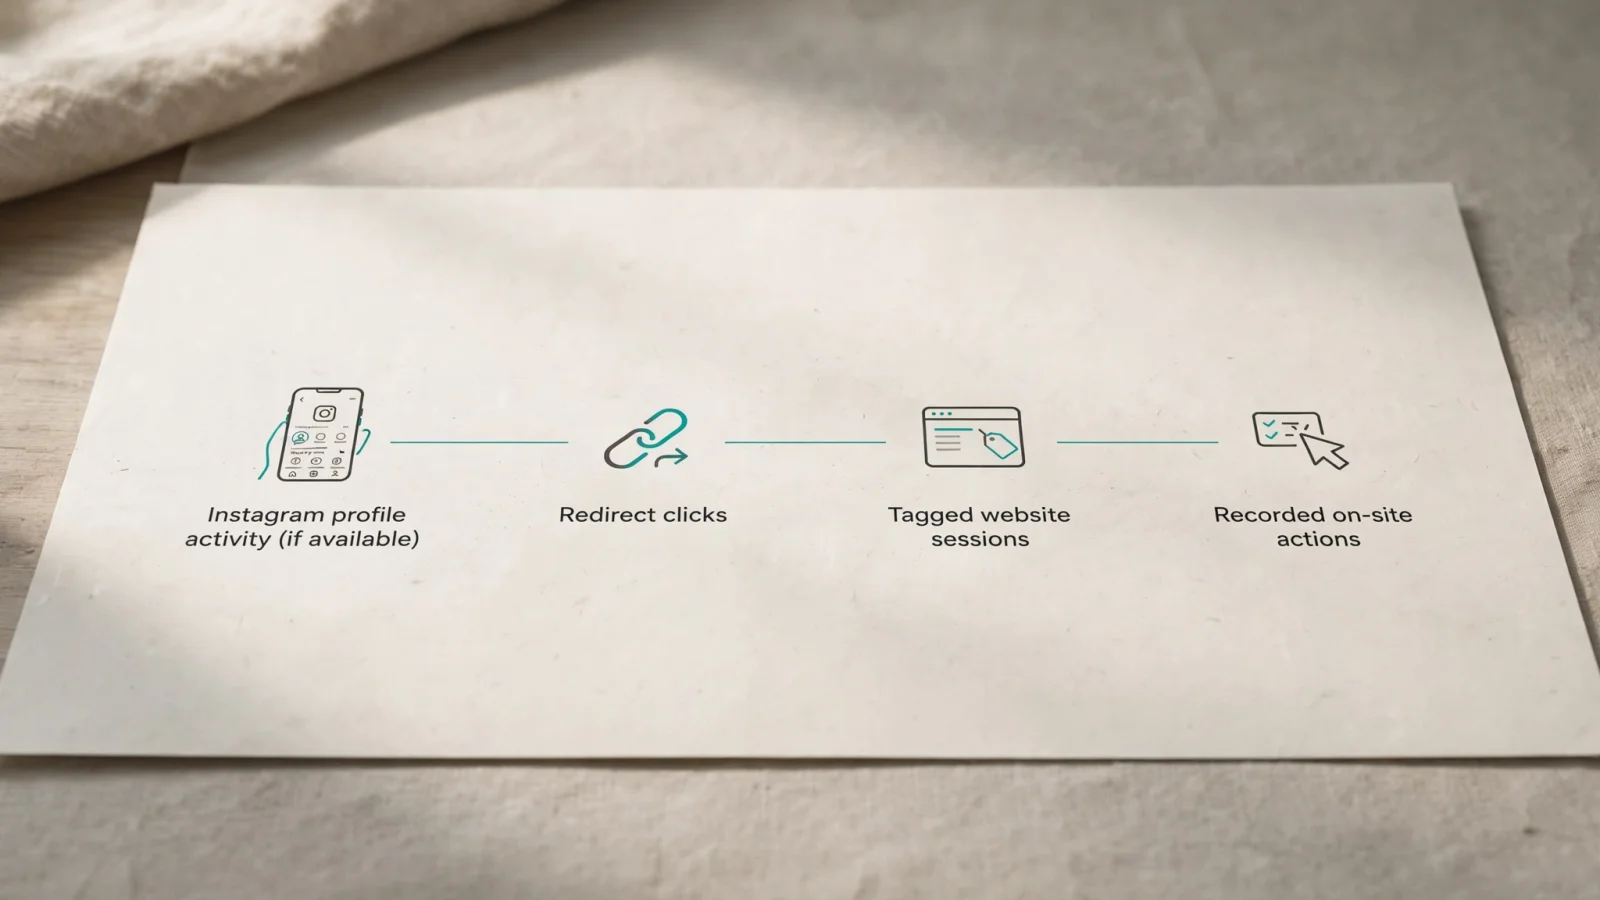
Tracking Instagram bio link behavior involves measuring separate stages rather than relying on one universal click count. When someone taps a URL in a social media profile, the action triggers a sequence of events across multiple systems. The path moves from Instagram-reported profile activity to a short-link redirect click, followed by a tagged website session, and ends with a configured on-site action like a form submission or purchase.
Each stage answers a distinct question about the visitor’s journey. Instagram Insights provides a platform-side signal about profile activity, provided a relevant metric appears in your account interface. As the visitor leaves the platform, Trnqify measures the redirect-time clicks for a specific short URL. Your destination website analytics then track which tagged campaign generated a site session, and your CRM reporting confirms whether the visitor completed a transaction.
For general context, Sprinklr’s Instagram Account Insights guide says Instagram Insights can show overall follower trends and how content performs with an audience.
Before You Start: Map Each Offer to a Destination
Mapping prerequisites before generating tracking tags prevents confusing data. Identify the exact destination page, the specific offer you plan to promote, and the active calendar period on your profile. Reusing a single short URL for unrelated campaigns makes historical data almost impossible to parse, so creating a distinct tagged short URL whenever a meaningful offer changes keeps your metrics accurate.
A simple change log helps organize this workflow. Try creating a spreadsheet with columns for the offer name, the final destination page, the new short URL, and the active dates. This record provides context during future reviews of your campaign reports, allowing you to match a specific tracking parameter to the exact date range it ran on the profile.
Directing your profile URL to a multi-button link-in-bio hub instead of a direct offer page requires separate tracking treatment. Loading the hub page represents a different action than selecting one of the specific offer buttons listed there. Tracking those subsequent destinations separately reveals which offers visitors chose after arriving at the intermediate landing page.
Consistent naming conventions help prevent fragmented reporting because Google Analytics treats UTM parameter values as case-sensitive. A visitor arriving via utm_source=Instagram and another via utm_source=instagram are treated as different source values. To avoid this, Google recommends a standardized UTM strategy for source, medium, and campaign tags. Use lowercase values consistently, as Google advises, so differently capitalized entries do not split across reports.

Step 1: Create a Tagged Short URL for Each Offer
Creating the final destination link means appending tracking parameters to your website URL before shortening it. This order ensures the destination analytics platform recognizes the traffic as a specific campaign rather than an unclassified referral. Tagging the destination URL first sets up the tracking, and then you create the short URL that handles the redirect.
For a new product launch, a base URL like https://example.com/spring-planner needs standard parameters appended to it. After applying these tags, the full destination link becomes https://example.com/spring-planner?utm_source=instagram&utm_medium=organic_social&utm_campaign=spring_planner_launch&utm_content=profile_bio.
The utm_source parameter identifies the originating platform, which is instagram in this case. The utm_medium parameter needs a consistently chosen channel label like organic_social, while the utm_campaign value names the specific offer, such as spring_planner_launch. Adding the utm_content variable provides an optional way to distinguish placement, allowing you to separate a profile_bio link from a story sticker. These UTM parameters help analytics platforms organize campaign traffic, though they do not count redirect clicks on their own.
To simplify this process, Trnqify provides an in-app AI UTM Assistant that drafts source, medium, and campaign values from a plain-language description. Describing the campaign prompts the assistant to suggest appropriate tags. A request might read: “I am promoting the spring planner through my Instagram profile during its launch. Suggest consistent, lowercase values for utm_source, utm_medium, and utm_campaign for this link.” Reviewing the resulting suggestions against your internal naming convention before publishing the URL speeds up ecommerce campaign tagging without requiring manual spreadsheet formulas.
Once the destination URL carries the correct tags, generate the short link. Trnqify uses the trnq.io domain by default on the free plan, including unlimited links and unlimited clicks, though a marketing interstitial appears after 1,000 clicks per month. Upgrading to Standard ($9/month) provides 25,000 clicks per month without the interstitial, and the Pro plan ($29/month) enables one custom domain alongside custom short-link slugs.
The resulting short URL delivers independent measurement by recording clicks at redirect time without placing cookies or tracking scripts on the shared links. We do not sell user data. This approach documents how many times the short link was fired, acting as a free click analytics tool for short links that operates entirely independently from the destination website’s visitor analytics.
For developers or businesses deploying AI agents, Trnqify supports programmatic link creation. Model Context Protocol (MCP) servers, Application-to-Application (A2A) authorization, and REST API access allow tools like Claude or custom workflows to generate tagged short URLs automatically on supported plans. These integrations help developers automating short URLs with AI maintain consistent tracking across large campaigns. While they streamline the link creation process, they do not automatically reconcile downstream conversion reports or measure destination actions.
Step 2: Add the Link to Your Profile and Test It
Open the Instagram application, navigate to the profile section, and select the option to edit your details. Paste the new shareable short URL into the designated links field to replace the previous entry, then save the changes and prepare to test the routing immediately.
Testing the full path on a mobile device confirms the sequence works correctly under real conditions. Tapping the profile link on your phone lets you watch the browser open, observe the redirect process, and verify the intended destination page loads. Checking the address bar in the mobile browser ensures the full UTM parameters remain attached to the URL after the redirect completes.
Google Analytics notes that redirects can strip UTM parameters and URL shorteners can remove referral details, so check that your tags remain intact when visitors reach your site. If a visit has no clear referral source, Analytics classifies it as (direct) / (none).
Testing the live link provides immediate confirmation that the analytics platform successfully receives the tags. Opening your website analytics dashboard and navigating to the real-time reporting view allows you to locate the specific campaign name. Seeing the test visit register confirms the entire setup functions correctly before any real visitors tap the profile, a check you should perform every time you swap the bio destination for a new offer.
Step 3: Compare Clicks, Sessions, and Actions
Interpreting the performance of your profile campaigns involves reviewing different reporting systems, because each platform observes the visitor at a distinct moment in their journey. Comparing these reports side-by-side provides a complete picture, as long as you do not expect the numbers to match perfectly.
When you manually tag destination URLs, Google Analytics collects traffic-source data and displays the UTM parameter values as dimensions in reports and explorations, as its guide to manual tagging and traffic-source dimensions explains.
| Measurement Point | What It Is Useful For | Do Not Equate It With |
|---|---|---|
| Instagram Insights (if shown) | A platform-side signal about profile activity based on Meta’s definitions. | A guaranteed count for each unique destination or a website conversion. |
| Trnqify short-link analytics | Comparing redirect-time clicks by specific short URL. | Website sessions, collected leads, purchases, or named individual people. |
| GA4 or website analytics | Reviewing tagged source, medium, campaign dimensions, and website sessions. | A guaranteed exact match to the shortener’s redirect click count. |
| CRM or conversion reporting | Measuring the specific on-site actions the business cares about. | Proof that every conversion came from one specific profile tap. |
A redirect click measured by Trnqify does not guarantee a completed website session. A visitor closing their browser before a heavy destination page finishes loading creates a scenario where Trnqify records the click but GA4 records nothing. Measuring short link behavior without cookies produces these natural drop-offs, so it helps to treat the reports as complementary views of the same campaign. Using short-link analytics gauges immediate interest and link performance, while website analytics evaluate how long visitors stayed and whether they completed the required action. If the shortener registers hundreds of clicks but the destination site shows zero sessions, the breakdown occurred during the page load rather than in the profile layout.
Troubleshooting Discrepancies Between Clicks and Sessions
A discrepancy between shortener clicks and website sessions does not automatically indicate broken tracking, but it does provide a reason to check your definitions and technical setup. Network latency, ad blockers, cookie consent banners, and user behavior all cause some drop-off between a redirect click and a recorded website session. A variance of ten to twenty percent often reflects normal web behavior, whereas a gap of ninety percent points to a technical failure.
Comparing the exact same short URL during the exact same active period prevents skewed data. Reusing an old link for a new campaign mixes historical clicks into the new comparison. Verifying that a new offer has its own dedicated link ensures the tagged destination still carries the correct campaign values after the redirect.
A case-sensitive mismatch also makes campaign reporting difficult to locate. Searching for Spring_Planner in your destination analytics when the link used spring_planner returns empty reports. Consulting the change log confirms the precise spelling applied during the creation step, avoiding this common error.
Routing traffic through a link-in-bio hub complicates this comparison further. Visitors arriving at a hub generate a session for that intermediate page, yet they might leave without clicking the individual offer buttons. Checking the specific URL path in your reporting software helps isolate where the visitor stopped, clarifying whether the drop-off occurred before the hub loaded or after the visitor viewed the available options.
Stop losing campaign context every time you update your profile link. Trnqify lets you create distinct, privacy-first short URLs for every new offer and track the subsequent redirect clicks. Start generating tagged campaign links with Trnqify to measure exactly which promotions drive your traffic.
Frequently Asked Questions
How do I track clicks on my Instagram bio link?
Creating a distinct short URL for your destination page, adding UTM parameters to identify the campaign, and placing the shortened link in your profile establishes the necessary tracking. The shortener's analytics count redirect clicks, while your website analytics track the resulting sessions.
Do UTM parameters count clicks by themselves?
UTM parameters organize traffic data inside analytics tools like Google Analytics to identify where a visitor originated, but they do not generate click counts independently. A shortener or redirect service is required to count the clicks before the visitor reaches the final destination.
Why might short-link clicks differ from GA4 sessions?
A shortener records a click the moment the link is followed, whereas a website analytics tool records a session only after the destination page loads, tracking scripts execute, and the user accepts applicable privacy policies. Visitors who abandon the page during loading generate a recorded click without creating a corresponding session.
How should I track a new offer after changing my profile link?
Tagging the new destination URL with updated campaign parameters, generating a fresh short URL for it, and recording the change in a spreadsheet prevents data overlap. This practice stops new clicks from blending into the historical data of your previous offers.
Does Instagram Insights show the same thing as link-shortener analytics?
Instagram Insights reports platform-side activity based on Meta's specific measurement definitions, which vary by account. In contrast, link shorteners measure the server-side redirects for a specific URL, meaning the labels, availability, and specific events measured by the two systems differ significantly.